
Launching and Connecting
Step 1: Launch the Askar Media App from the main menu.

Step 2: Now you should see the front page asking for the ip address you're hosting on (this is displayed on the home page of the server application)


Step 3: Select the text box and enter your ip
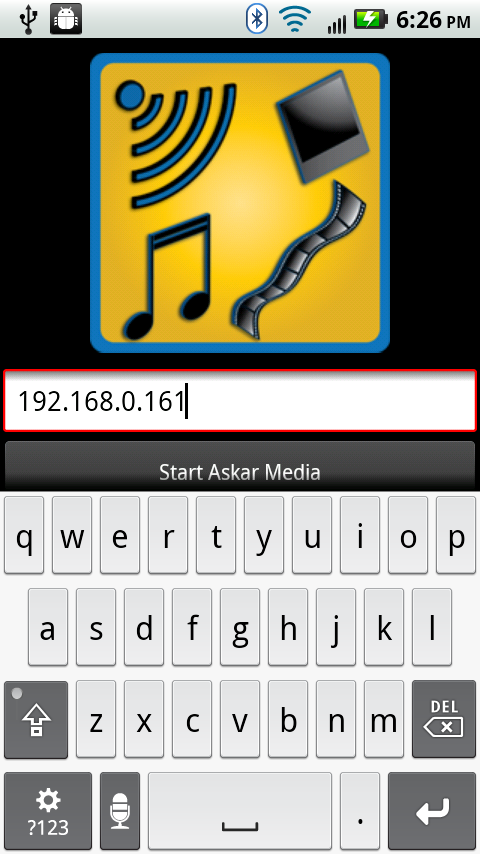
Step 4: After entering your ip, press the "Start Askar Media" button

Step 5: Now a loading screen will appear while the app retrieves your library information

You have now successfully launched the app and connected to your server!
Music and Playlists
Note: This part of the tutorial assumes that you have previously created at least one playlist on your server app otherwise the option will be "All Music". To create playlists please refer to the server tutorial on our webpage Here
Step 1:Now that you're connected, you will be taken to the initial tab of the app, the music player tab. This tab is used to control the playback of your selected playlist.

Step 2: From here, you will press on the playlist tab. This will switch view to the default playlist "All Music" containing as expected all of your music.

Step 3: If you wish to select a different playlist simply press the current playlist name, in this case "All Music".
This will bring up a playlist chooser.

Step 4: You can now scroll to your desired playlist. To change to your new playlist, press the playlist name. In this case the playlist "Ryan" was selected.

Step 5: Now the app will populate the Playlist tab with the selected playlist.

Step 6: You can now scroll to your desired song, or simply press the first song to begin playback of your playlist.

Step 7: The app will now display the Music Player tab. This will be used to control playback of your playlist. You have access to normal music player functionality such as play, pause, stop, next, previous, shuffle and repeat.

Step 8: You can toggle the shuffle button OFF and ON. When shuffle is ON, the next song will be random and playback will continue until shuffle is toggled OFF or the stop button is pressed.

Step 9: Like the shuffle button, repeat can be toggled. It will change between three states, OFF, ALL and ONE. OFF, as you might have guessed, prevents the playlist from repeating in a linear fashion. ALL, will start the playlist from the beginning after it has reached the end. And finally ONE, will repeat the current song until prev, next or stop have been pressed. Or, until repeat has been toggled to a different state.


Movies
Step 1: After launching and connecting press the movies tab icon. This will display your movies library.

Step 2: You are now able to scroll to your desired movie and select it by pressing on the title. As you may have noticed, the movies are displayed by title in lexicographical order. Navigating large libraries is made easy by use of a fast scroll icon that you can drag to desired sections of your library. Note: the fast scroll icon will only appear on lists of sufficient size.

Step 3: From here the app will take you to a fullscreen movie player with standard Android video controls. The controls will display for three seconds at the beginning of a movie and for another three seconds whenever the screen is touched. To return to the movie list, press the back button on your phone.

Photos
Step 1: After launching and connecting, press the photos tab icon. This will display your photo library. As you will notice, the thumbnails will first appear as stock green icons. The individual thumbnails will appear as they become available.

Step 2: This is how the photo library will appear after the thumbnails have loaded.

Step 3: To view any desired photo, simply scroll to the photo you would like to view and press it's title.

Step 4: You will now be taken to full screen photo viewer. The photo viewer allows pinch to zoom, tap to zoom and panning. To return to the photos library press the back button on your phone


